Content Cards用のフィードをカスタマイズする
Content Cardsフィードは、モバイルまたはWebアプリケーションにおける一連のContent Cardsです。この記事では、フィードの更新タイミングの設定、カードの順序、複数フィードの管理、「空のフィード」エラーメッセージについて説明します。コンテンツカードタイプの完全なリストについては、Content Cardsについてを参照してください。
セッションのライフサイクルについて
セッションとは、Braze SDKがアプリ起動後にユーザーの活動をトラッキングする期間を指します。また、changeUser()メソッドを呼び出すことで、新しいセッションを強制的に開始することもできます。
デフォルトでは、セッションは最初にbraze.openSession()を呼び出した時点で開始されます。セッションは、最大30分間操作がない状態が続くと終了します(デフォルトのセッションタイムアウトを変更した場合、またはユーザーがアプリを閉じた場合を除きます)。

Androidのアクティビティライフサイクルコールバックを設定している場合、Brazeはアプリ内の各アクティビティに対してopenSession()とcloseSession()を自動的に呼び出します。
デフォルトでは、セッションはopenSession()が最初に呼び出された時に開始されます。アプリがバックグラウンドに移行した後、再びフォアグラウンドに戻った場合、SDKはセッション開始から10秒以上経過しているかどうかを確認します(デフォルトのセッションタイムアウトを変更しない限り)。経過している場合、新しいセッションが開始されます。なお、ユーザーがバックグラウンドでアプリを閉じた場合、セッションデータはアプリを再度開くまでBrazeに送信されない可能性があることに留意してください。
closeSession()を呼び出しても、セッションは直ちに終了しません。代わりに、ユーザーが別のアクティビティを開始して再度openSession()を呼び出さない場合、10秒後にセッションが終了します。
デフォルトでは、セッションはBraze.init(configuration:)を呼び出した時に開始されます。これはUIApplicationWillEnterForegroundNotification通知がトリガーされた時に発生し、アプリがフォアグラウンドに入ったことを意味します。
アプリがバックグラウンドに移行すると、UIApplicationDidEnterBackgroundNotificationがトリガーされます。アプリはバックグラウンドではアクティブなセッションを維持しません。アプリがフォアグラウンドに戻った時、SDKはセッション開始からの経過時間をセッションタイムアウトと比較します(デフォルトのセッションタイムアウトを変更しない限り)。セッション開始からの時間がタイムアウト期間を超えた場合、新しいセッションが開始されます。
フィードの更新
自動更新
デフォルトでは、Content Cardフィードは次の場合に自動的に更新されます。
- 新しいセッションが開始されたとき
- 前回の更新から60秒以上経過した後に、デフォルトのContent Cardフィードを閉じて再度開いたとき

手動で更新しなくても最新のContent Cardsを動的に表示するには、カードの作成時に初回インプレッション時を選択します。これらのカードは、利用可能になった時点で更新されます。
リアルタイム配信
Brazeは、SDKがセッション中に維持するライブ接続を介して、Content Cardの更新が発生するとすぐにデバイスへ送信します。ユーザーは、変更を確認するために新しいセッションを開始したり、更新を待ったりする必要はありません。リアルタイム配信は、デフォルトのContent Cardフィードとカスタマイズされたフィードの両方で機能します。
リアルタイム配信の対象となる更新は次のとおりです。
- セッション中にユーザーがContent Cardキャンペーンの対象になった場合
- ユーザーがキャンバス内のContent Cardステップに進んだ場合
- ユーザーのフィードからカードが削除された場合
/messages/send、/campaigns/trigger/send、/canvas/trigger/sendエンドポイントなどのAPIを介してカードが送信された場合
リアルタイム配信には、次の最小SDKバージョンが必要です。
それより前のSDKバージョンでは、カードは引き続きセッション開始時と更新時に届きます。
手動更新
特定のタイミングでフィードを手動で更新するには、次のようにします。
requestContentCardsRefresh() を呼び出すと、Web SDKからいつでもBraze Content Cardsの手動更新をリクエストできます。
また、getCachedContentCards を呼び出して、前回のContent Cardsの更新で取得した、現在利用可能なすべてのカードを取得することもできます。
import * as braze from "@braze/web-sdk";
function refresh() {
braze.requestContentCardsRefresh();
}
Content Cardのリンクを同じタブではなく新しいブラウザータブで開くには、Web SDKの初期化オプションで openCardsInNewTab: true を設定します。初期化オプションの詳細については、Web SDKリポジトリガイドを参照してください。
requestContentCardsRefresh を呼び出すと、Android SDKからいつでもBraze Content Cardsの手動更新をリクエストできます。
Braze.getInstance(context).requestContentCardsRefresh();
Braze.getInstance(context).requestContentCardsRefresh()
Braze.ContentCards クラスの requestRefresh メソッドを呼び出すと、Swift SDKからいつでもBraze Content Cardsの手動更新をリクエストできます。
Swiftでは、オプションの完了ハンドラーを使用するか、ネイティブのSwift同時実行APIを使用した非同期の戻り値によって、Content Cardsを更新できます。
完了ハンドラー
AppDelegate.braze?.contentCards.requestRefresh { result in
// Implement completion handler
}
Async/Await
let contentCards = await AppDelegate.braze?.contentCards.requestRefresh()
[AppDelegate.braze.contentCards requestRefreshWithCompletion:^(NSArray<BRZContentCardRaw *> * contentCards, NSError * error) {
// Implement completion handler
}];
完全同期と部分同期
Braze SDKは、サーバーからContent Cardsを取得する際に2種類の同期を使用します。
- 完全同期: ユーザーが対象となるすべてのContent Cardsを取得します。完全同期は、7日ごと、または
changeUser()が呼び出されるたびに自動的に行われます。 - 部分同期: 前回のリクエスト以降の新しいContent Cardsのみを取得します。ユーザーが新しいカードの対象になっていない場合、レスポンスで返されるカードは0件です。部分同期は、
requestContentCardsRefresh()が呼び出されるたびに行われます (ただし、前回の完全同期から7日が経過している場合は、代わりに完全同期がトリガーされます)。
部分同期により、サーバーの負荷とデバイスのバッテリー消費が軽減されます。すでに受信したContent CardsはSDKにローカルで保存されるため、部分同期で新しいカードが0件の場合でも、ユーザーは利用可能なカードを引き続き表示できます。
レート制限
Brazeはトークンバケットアルゴリズムを使用して、次のレート制限を適用します。
- デバイスごとに最大5回の更新呼び出しが可能で、この回数はユーザー間および
openSession()の呼び出しと共有されます - 制限に達すると、180秒 (3分) ごとに新しい呼び出しが1回利用可能になります
- システムは、いつでも使用できるように最大5回分の呼び出しを保持します
- レート制限中でも、
subscribeToContentCards()はキャッシュされたカードを返します

Braze SDKは、パフォーマンスと信頼性のためにもレート制限を適用します。自動テストを実行する場合や手動でQAを行う場合は、この点に留意してください。詳細については、Braze SDKのレート制限を参照してください。
表示されるカードの順序をカスタマイズする
Content Cardsの表示順序は変更できます。期間限定のプロモーションなど、特定の種類のコンテンツを優先することで、ユーザーエクスペリエンスを細かく調整できます。
フィード内のContent Cardsの表示順序をカスタマイズするには、showContentCards(): の filterFunction パラメーターを使用します。例:
braze.showContentCards(null, (cards) => {
return sortBrazeCards(cards); // Where sortBrazeCards is your sorting function that returns the sorted card array
});
ContentCardsFragment は、Content Cardsがフィードに表示される前の並べ替えや変更を IContentCardsUpdateHandler で処理します。カスタムの更新ハンドラーは、ContentCardsFragment の setContentCardUpdateHandler で設定できます。
以下はデフォルトの IContentCardsUpdateHandler で、カスタマイズの出発点として使用できます。
Java の例を表示
public class DefaultContentCardsUpdateHandler implements IContentCardsUpdateHandler {
// Interface that must be implemented and provided as a public CREATOR
// field that generates instances of your Parcelable class from a Parcel.
public static final Parcelable.Creator<DefaultContentCardsUpdateHandler> CREATOR = new Parcelable.Creator<DefaultContentCardsUpdateHandler>() {
public DefaultContentCardsUpdateHandler createFromParcel(Parcel in) {
return new DefaultContentCardsUpdateHandler();
}
public DefaultContentCardsUpdateHandler[] newArray(int size) {
return new DefaultContentCardsUpdateHandler[size];
}
};
@Override
public List<Card> handleCardUpdate(ContentCardsUpdatedEvent event) {
List<Card> sortedCards = event.getAllCards();
// Sort by pinned, then by the 'updated' timestamp descending
// Pinned before non-pinned
Collections.sort(sortedCards, new Comparator<Card>() {
@Override
public int compare(Card cardA, Card cardB) {
// A displays above B
if (cardA.getIsPinned() && !cardB.getIsPinned()) {
return -1;
}
// B displays above A
if (!cardA.getIsPinned() && cardB.getIsPinned()) {
return 1;
}
// At this point, both A & B are pinned or both A & B are non-pinned
// A displays above B since A is newer
if (cardA.getUpdated() > cardB.getUpdated()) {
return -1;
}
// B displays above A since A is newer
if (cardA.getUpdated() < cardB.getUpdated()) {
return 1;
}
// At this point, every sortable field matches so keep the natural ordering
return 0;
}
});
return sortedCards;
}
// Parcelable interface method
@Override
public int describeContents() {
return 0;
}
// Parcelable interface method
@Override
public void writeToParcel(Parcel dest, int flags) {
// No state is kept in this class so the parcel is left unmodified
}
}
Kotlin の例を表示
class DefaultContentCardsUpdateHandler : IContentCardsUpdateHandler {
override fun handleCardUpdate(event: ContentCardsUpdatedEvent): List<Card> {
val sortedCards = event.allCards
// Sort by pinned, then by the 'updated' timestamp descending
// Pinned before non-pinned
sortedCards.sortWith(Comparator sort@{ cardA: Card, cardB: Card ->
// A displays above B
if (cardA.isPinned && !cardB.isPinned) {
return@sort -1
}
// B displays above A
if (!cardA.isPinned && cardB.isPinned) {
return@sort 1
}
// At this point, both A & B are pinned or both A & B are non-pinned
// A displays above B since A is newer
if (cardA.updated > cardB.updated) {
return@sort -1
}
// B displays above A since A is newer
if (cardA.updated < cardB.updated) {
return@sort 1
}
0
})
return sortedCards
}
// Parcelable interface method
override fun describeContents(): Int {
return 0
}
// Parcelable interface method
override fun writeToParcel(dest: Parcel, flags: Int) {
// No state is kept in this class so the parcel is left unmodified
}
companion object {
// Interface that must be implemented and provided as a public CREATOR
// field that generates instances of your Parcelable class from a Parcel.
val CREATOR: Parcelable.Creator<DefaultContentCardsUpdateHandler?> = object : Parcelable.Creator<DefaultContentCardsUpdateHandler?> {
override fun createFromParcel(`in`: Parcel): DefaultContentCardsUpdateHandler? {
return DefaultContentCardsUpdateHandler()
}
override fun newArray(size: Int): Array<DefaultContentCardsUpdateHandler?> {
return arrayOfNulls(size)
}
}
}
}
Jetpack ComposeでContent Cardsをフィルタリングおよび並べ替えるには、cardUpdateHandler パラメーターを設定します。例:
ContentCardsList(
cardUpdateHandler = {
it.sortedWith { cardA, cardB ->
// A displays above B
if (cardA.isPinned && !cardB.isPinned) {
return@sortedWith -1
}
// B displays above A
if (!cardA.isPinned && cardB.isPinned) {
return@sortedWith 1
}
// At this point, both A & B are pinned or both A & B are non-pinned
// A displays above B since A is newer
if (cardA.updated > cardB.updated) {
return@sortedWith -1
}
// B displays above A since A is newer
if (cardA.updated < cardB.updated) {
return@sortedWith 1
}
0
}
}
)
静的変数 Attributes.defaults を直接変更して、カードフィードの順序をカスタマイズします。
var attributes = BrazeContentCardUI.ViewController.Attributes.defaults
attributes.transform = { cards in
cards.sorted {
if $0.pinned && !$1.pinned {
return true
} else if !$0.pinned && $1.pinned {
return false
} else {
return $0.createdAt > $1.createdAt
}
}
}
let viewController = BrazeContentCardUI.ViewController(braze: AppDelegate.braze, attributes: attributes)
Objective-Cでは、BrazeContentCardUI.ViewController.Attributes によるカスタマイズは利用できません。
「空のフィード」メッセージのカスタマイズ
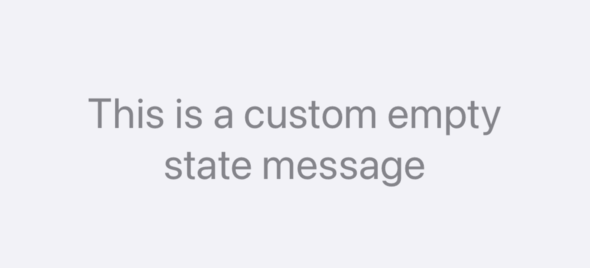
ユーザーがどの Content Cardsの対象にもならない場合、SDKは「We have no updates. Please check again later.」という「空のフィード」エラーメッセージを表示します。この「空のフィード」エラーメッセージは、次のようにカスタマイズできます。
Web SDK では、「空のフィード」の文言をプログラムで置き換えることはできません。フィードが表示されるたびに置き換えることもできますが、フィードの更新に時間がかかることがあり、空のフィードのテキストがすぐに表示されないため、この方法はおすすめしません。
ContentCardsFragment は、ユーザーがどの Content Cardsの対象にもならないと判断すると、空のフィードのエラーメッセージを表示します。
このエラーメッセージを表示するために、特別なアダプターである EmptyContentCardsAdapter が標準の ContentCardAdapter の代わりに使用されます。カスタムメッセージ自体を設定するには、文字列リソース com_braze_feed_empty をオーバーライドします。
このメッセージの表示に使用されるスタイルは Braze.ContentCardsDisplay.Empty で確認でき、次のコードスニペットにも示しています。
<style name="Braze.ContentCardsDisplay.Empty">
<item name="android:lineSpacingExtra">1.5dp</item>
<item name="android:text">@string/com_braze_feed_empty</item>
<item name="android:textColor">@color/com_braze_content_card_empty_text_color</item>
<item name="android:textSize">18.0sp</item>
<item name="android:gravity">center</item>
<item name="android:layout_height">match_parent</item>
<item name="android:layout_width">match_parent</item>
</style>
Content Cardのスタイル要素のカスタマイズについて詳しくは、スタイルのカスタマイズを参照してください。
Jetpack Compose で「空のフィード」エラーメッセージをカスタマイズするには、ContentCardsList に emptyString を渡します。さらに、ContentCardListStyling に emptyTextStyle を渡すと、このメッセージをより細かくカスタマイズできます。
ContentCardsList(
emptyString = "No messages today",
style = ContentCardListStyling(
emptyTextStyle = TextStyle(...)
)
)
代わりに表示したい Composable がある場合は、ContentCardsList に emptyComposable を渡します。emptyComposable を指定した場合、emptyString は使用されません。
ContentCardsList(
emptyComposable = {
Image(
painter = painterResource(id = R.drawable.noMessages),
contentDescription = "No messages"
)
}
)
関連する Attributes を設定して、ビューコントローラーの空の状態をカスタマイズします。
var attributes = BrazeContentCardUI.ViewController.Attributes.defaults
attributes.emptyStateMessage = "This is a custom empty state message"
attributes.emptyStateMessageFont = .preferredFont(forTextStyle: .title1)
attributes.emptyStateMessageColor = .secondaryLabel
空の Content Card フィードに自動的に表示される文言を変更するには、アプリの ContentCardsLocalizable.strings ファイルで、ローカライズ可能な Content Card の文字列を再定義します。
このメッセージをさまざまなロケールの言語で更新したい場合は、Resources フォルダー構造で該当する言語を探し、文字列 ContentCardsLocalizable.strings を確認してください。
複数のフィードの実装
Content Cardsはアプリ上でフィルタリングして特定のカードだけを表示できるため、ユースケースごとに複数の Content Card フィードを用意できます。たとえば、トランザクションフィードとマーケティングフィードの両方を運用できます。これを実現するには、Braze ダッシュボードでキーと値のペアを設定して、Content Cardsのカテゴリーを分けて作成します。次に、アプリやサイトで、これらの種類の Content Cardsをそれぞれ異なる方法で扱うフィードを作成し、一部の種類を除外して他の種類を表示します。
ステップ1:カードにキーと値のペアを設定する
Content Card キャンペーンを作成するときに、各カードにキーと値のペアのデータを設定します。このキーと値のペアを使用してカードを分類します。キーと値のペアは、カードのデータモデルの extras プロパティに保存されます。
この例では、カードをどの Content Card フィードに表示するかを指定するために、キー feed_type を持つキーと値のペアを設定します。値には、home_screen や marketing など、カスタムフィードの名前を指定します。
ステップ2:Content Cardsをフィルタリングする
キーと値のペアを割り当てたら、表示したいカードを表示し、それ以外の種類のカードを除外するロジックを持つフィードを作成します。この例では、キーと値のペアが feed_type: "Transactional" に一致するカードだけを表示します。
次の例では、Transactional タイプのカードの Content Cards フィードを表示します。
/**
* @param {String} feed_type - value of the "feed_type" KVP to filter
*/
function showCardsByFeedType(feed_type) {
braze.showContentCards(null, function(cards) {
return cards.filter((card) => card.extras["feed_type"] === feed_type);
});
}
次に、カスタムフィードの切り替えを設定できます。
// show the "Transactional" feed when this button is clicked
document.getElementById("show-transactional-feed").onclick = function() {
showCardsByFeedType("Transactional");
};
詳細については、SDK メソッドのドキュメントを参照してください。
デフォルトでは、Content Card フィードは ContentCardsFragment に表示され、IContentCardsUpdateHandler は Braze SDKから ContentCardsUpdatedEvent を受け取った後に、表示するカードのリストを返します。ただし、これはカードの並べ替えのみを行い、フィルタリングは直接処理しません。
ステップ2.1:カスタムハンドラーを作成する
ダッシュボードで設定したキーと値のペアを Card.getExtras() で取得するカスタムの IContentCardsUpdateHandler を実装し、先ほど設定した feed_type の値に一致しないカードをリストから削除するように変更することで、Content Cardsを除外できます。
Show Java example
private IContentCardsUpdateHandler getUpdateHandlerForFeedType(final String desiredFeedType) {
return new IContentCardsUpdateHandler() {
@Override
public List<Card> handleCardUpdate(ContentCardsUpdatedEvent event) {
// Use the default card update handler for a first
// pass at sorting the cards. This is not required
// but is done for convenience.
final List<Card> cards = new DefaultContentCardsUpdateHandler().handleCardUpdate(event);
final Iterator<Card> cardIterator = cards.iterator();
while (cardIterator.hasNext()) {
final Card card = cardIterator.next();
// Make sure the card has our custom KVP
// from the dashboard with the key "feed_type"
if (card.getExtras().containsKey("feed_type")) {
final String feedType = card.getExtras().get("feed_type");
if (!desiredFeedType.equals(feedType)) {
// The card has a feed type, but it doesn't match
// our desired feed type, remove it.
cardIterator.remove();
}
} else {
// The card doesn't have a feed
// type at all, remove it
cardIterator.remove();
}
}
// At this point, all of the cards in this list have
// a feed type that explicitly matches the value we put
// in the dashboard.
return cards;
}
};
}
Show Kotlin example
private fun getUpdateHandlerForFeedType(desiredFeedType: String): IContentCardsUpdateHandler {
return IContentCardsUpdateHandler { event ->
// Use the default card update handler for a first
// pass at sorting the cards. This is not required
// but is done for convenience.
val cards = DefaultContentCardsUpdateHandler().handleCardUpdate(event)
val cardIterator = cards.iterator()
while (cardIterator.hasNext()) {
val card = cardIterator.next()
// Make sure the card has our custom KVP
// from the dashboard with the key "feed_type"
if (card.extras.containsKey("feed_type")) {
val feedType = card.extras["feed_type"]
if (desiredFeedType != feedType) {
// The card has a feed type, but it doesn't match
// our desired feed type, remove it.
cardIterator.remove()
}
} else {
// The card doesn't have a feed
// type at all, remove it
cardIterator.remove()
}
}
// At this point, all of the cards in this list have
// a feed type that explicitly matches the value we put
// in the dashboard.
cards
}
}
ステップ2.2:フラグメントに追加する
IContentCardsUpdateHandler を作成したら、それを使用する ContentCardsFragment を作成します。このカスタムフィードは、他の ContentCardsFragment と同じように使用できます。アプリのさまざまな場所で、ダッシュボードで指定したキーに基づいて異なる Content Card フィードを表示します。各フラグメントにカスタムの IContentCardsUpdateHandler があるため、各 ContentCardsFragment フィードには固有のカードのセットが表示されます。
Show Java example
// We want a Content Cards feed that only shows "Transactional" cards.
ContentCardsFragment customContentCardsFragment = new ContentCardsFragment();
customContentCardsFragment.setContentCardUpdateHandler(getUpdateHandlerForFeedType("Transactional"));
Show Kotlin example
// We want a Content Cards feed that only shows "Transactional" cards.
val customContentCardsFragment = ContentCardsFragment()
customContentCardsFragment.contentCardUpdateHandler = getUpdateHandlerForFeedType("Transactional")
このフィードに表示する Content Cardsをフィルタリングするには、cardUpdateHandler を使用します。以下に例を示します。
ContentCardsList(
cardUpdateHandler = {
it.filter { card ->
card.extras["feed_type"] == "Transactional"
}
}
)
The following example will show the Content Cards feed for Transactional type cards:
// Filter cards by the `Transactional` feed type based on your key-value pair.
let transactionalCards = cards.filter { $0.extras["feed_type"] as? String == "Transactional" }
さらに一歩進めて、Attributes 構造体の transform プロパティを設定すると、ビューコントローラーに表示されるカードをフィルタリングし、条件に一致するカードだけを表示できます。
var attributes = BrazeContentCardUI.ViewController.Attributes.defaults
attributes.transform = { cards in
cards.filter { $0.extras["feed_type"] as? String == "Transactional" }
}
// Pass your attributes containing the transformed cards to the Content Card UI.
let viewController = BrazeContentCardUI.ViewController(braze: AppDelegate.braze, attributes: attributes)
// Filter cards by the `Transactional` feed type based on your key-value pair.
NSMutableArray<BRZContentCardRaw *> *transactionalCards = [[NSMutableArray alloc] init];
for (BRZContentCardRaw *card in AppDelegate.braze.contentCards.cards) {
if ([card.extras[@"feed_type"] isEqualToString:@"Transactional"]) {
[transactionalCards addObject:card];
}
}